
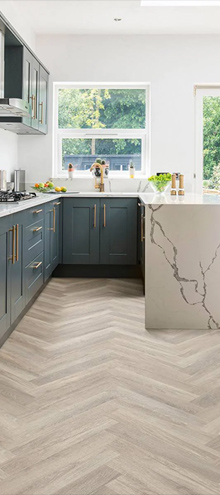

Whether you’re re-laying the flooring of your bathroom or looking to add that finishing touch to your kitchen, you’re probably already aware of just how many flooring material options there are out there, including LVT flooring. But how exactly do you lay LVT flooring, and how do the various installation methods differ from each other?
Blending excellent durability with ever-increasing affordability, LVT (Luxury Vinyl Tiles) has rapidly grown in popularity in recent years, with many homeowners turning to it as the preferred flooring option to standard sheet vinyl when it comes to DIY projects.
If you’re thinking of laying LVT floors in your home and want to know all the details involved in the process, take a look below. Our detailed guide can tell you everything you need to know about how to lay LVT flooring, including preparation, tips for a smooth installation, and the tools you’ll need for a perfect finish.
What tools do you need?
First things first, before you even begin to think about the process of how to lay your LVT floor, you’ll need to gather all the essential tools you’ll need to complete this project properly.
So, if you’re laying LVT for the first time, we highly recommend gathering the following tools:
- A tape measure
- Ruler
- Pencil
- Utility knife
- A straight edge
- A notched adhesive spreader (if required)
- Roller (if required)
- Spacers and wedges
- A T-square
- Rubber mallet
- Spirit level
- LVT tile adhesive (if required)
- An LVT underlay (if required)
Acclimatising your tiles
Once you’ve gathered all of the above tools, you’ll naturally also want to make sure that you have your chosen LVT tiles to hand for installation. However, rather than laying them on your floor directly after purchase, it’s highly recommended that you let them acclimatise to the space beforehand.
This is to allow your tiles to adjust to the room’s temperature and humidity. Doing this will help you avoid any potential cracking, peeling, and fracturing issues that may come as a result of your tiles settling after installation, giving you a smoother finish overall once your tiles are all in place.
For the best results, experts recommend leaving your unopened tile boxes in their installation room, outside of direct sunlight, for at least 48 hours beforehand, though bear in mind that some LVT products may have specific acclimation requirements, so be sure to check the manufacturer’s instructions.
Preparing your floor
From here, your next step before laying your LVT tiles is to ensure that the floor you’re laying them on has been properly prepared – and that means thoroughly cleaning it.
If you’ve not done so already, remove all furniture from the room, pull up your old flooring if required, brush and hoover the floor, clean it thoroughly, and then hoover the whole area again once dried.
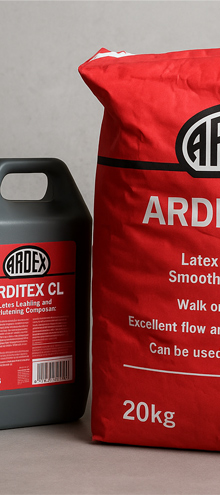
Next, take your spirit level and a straight edge and check to see if your floor is consistently level. Take note of any bumps, dips, and cracks you find, and if these are over 2mm, then you’ll need to either sand them down with your mechanical sander or fill them with an appropriate floor screed or floor-levelling compound.
Finally, once any floor-levelling compound you’ve applied is dry, hoover the floor a final time to ensure the whole area is free of contaminants.
Performing a dry-run
Last, but not least, the final step before properly laying your LVT is to perform what’s known as a dry run. A dry-run is where you lay your tiles out on the floor without adhering them in place so that you can see how they might look when actually installed.
Doing this has two key benefits:
First, it allows you to perfectly align your planks before laying – minimising the chance of mistakes being made during installation.
Second, it’ll give you a good idea of where you should start your installation from, and whether or not any planks may need to be cut in order to accommodate your room edges and any awkward corners or doorways.
How to lay LVT adhesive flooring
As simple as LVT click flooring is to install, it may be the case that you want a more secure finish for your new floor. If so, then you’ll probably be looking to install adhesive LVT flooring instead:
1. Applying your adhesive
Starting from the centre of the room, apply the recommended amount of adhesive for several tiles, as stated on your chosen adhesive product, to the floor or underlay, so that you can then firmly press your tiles into place.
We strongly advise that you do this process bit by bit, breaking up your rows into two to three segments, fitting your tiles, and then moving on to the next group. Doing this will minimise the likelihood of your adhesive drying out before your tiles are placed, maximising the strength of the adhesive bond and creating a more secure floor.
2. Laying your tiles
Having applied your first section of adhesive, take your starting tile and firmly press it into the glue, then repeat the process towards either wall. As you do this, take the time to ensure your tiles are aligned correctly and in your desired pattern, as well as using tile spaces to maintain the necessary expansion space between them.
Once again, when it comes to your final row and room edges, you may need to cut the LVT to fit using your T-square and utility knife. Taking precise measurements, cut your tiles to fit, apply the necessary adhesive, and firmly press them into place before inserting spacers.
3. Rolling your floor
Once all your tiles have been placed, take your flooring roller and apply pressure evenly and consistently across the entire floor. Doing this will help to ensure as strong a bond as possible between the tiles and their adhesive, resulting in a more durable and long-lasting installation.
4. Cleaning and sealing your tiles
Finally, having completed your LVT installation, take time to clean your new floors and remove any remaining adhesive residue. Then to completely protect your tiles, you might want to apply an LVT floor sealer, which will protect them from external damage and enhance their longevity.
Find your ideal LVT tiles in our range
With all those points covered, you should hopefully have a much better idea of how to install LVT flooring in your home to achieve a beautiful showroom floor finish, no matter the room you’re working in.
Naturally, this sort of DIY isn’t for everyone, and if you prefer, you can always hire a professional to do the fitting for you. Either way, however, you’ll still need your chosen LVT tiles to hand for any installation to take place – which is why you should browse the Flooring King range today!
From wood-effect LVTs that mimic traditional oak to stone-effect LVT that seamlessly recreates a natural tile finish, we’ve plenty of distinct style options for you to choose from in our range from plenty of well-known flooring brands. Get in touch with our team today to find out more and don’t forget to visit our blog for more information on what LVT is and our other installation guides.
LVT flooring fitting FAQs
Do you still have some questions about laying LVT flooring? Take a look at our FAQs below for more information on the topic:
Do you need an LVT underlay?
Although our installation guide discusses the process by which you’d install an LVT underlay, such an addition is not always required – it really depends on the type of LVT you buy.
Nowadays, there are plenty of high-quality LVT options that come with the underlay as part of their tile construction, meaning there’s no need to lay an additional LVT underlay beneath.
If you’re at all unsure if you’ll need an underlay for your new LVT floor, it’s best to check with the manufacturer or our flooring experts before making your purchase.
